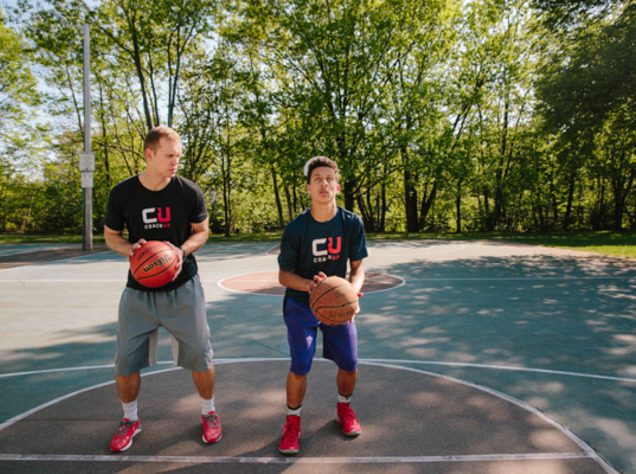
Tips For Creating Proper Shooting Form
Whether you’re just starting to play basketball or you’re getting ready to play at a collegiate level, it’s important to develop a clean shot with the proper fundamentals. It’s particularly important for any aspiring player to breaking those old, bad habits as quickly as possible. Although it may seem difficult at first, it’s essential practice to ready yourself for a bigger stage. Any weaknesses in a shot will only be magnified as a player battles against tougher competition on the court.
It’ll be really easy to slip back into old mistakes and habits if you’re not diligently crafting your game and evolving every time you’re on the court. Sloppy and lazy practices will lead to a less-than-polished product on the court. So take your practice seriously and turn that mysterious shot into an unbelievably reliable one with these CoachUp tips.
Step 1: Square Up + Set Your Feet
First and foremost, a player must get squared up to the basket before he or she even considers taking a shot. For right-handed shooters, one would square his shot up with his right foot, and vice versa for lefties. The player must also be down low as if sitting in an invisible chair with their shoulders back. The player should also focus on keeping balance, so his feet should be no further than shoulder width apart with one foot next to the other.
Step 2: Ball Handling + Hand Positioning
This is a very crucial part of your form and most young players do not pick up on this step until they are taught. This step requires the shooting hand to be spread wide with the shooting hand behind the ball, not to the side. This will also ensure that the shooting elbow will be close to the body. Another crucial element to this step is not allowing the ball to rest on your palm, which will lead to a far less smooth shot. Instead, rest it on your fingertips, this is the only way to create the very important backwards rotation that any shooter needs.
Step 3: The Shooter’s Pocket
The guide-hand, or your non-shooting hand, should be placed on the side of the ball. If you move it up towards your shooting hand, you’ll notice that the thumbs will come together and form a T shape. If this happens, then you’ll know that you’re placing the hands in the correct position. The guide-hand is simply used to help put the shooting hand into the shooter’s pocket. Once this is established, there is no longer a use for the guide hand.
The shooter’s pocket is a 90 degree angle and should look as if the arm is forming an L. You’ll notice that once you put the ball into the shooter’s pocket, there will be an open window between the guide hand and shooting hand. If this is done properly, you will notice you are now behind and under the ball. If you’re not under the ball, then your legs are not low enough and you will need to get lower to the ground.
Step 4: Popping The Elbow + Wrist
The fourth step is the shot itself which requires fluid motion and the popping of your elbow and wrist. Try really over-exaggerating this step and put a lot of emphasis on accentuating these motions. When popping the wrist, you should feel the ball coming off the fingertips so as to create the essential backwards rotation.
The most crucial part of this step is to understand that once the ball is placed into the shooter’s pocket, the guide hand should be removed. Young players often do not understand this concept and that’s why most of them shoot with two hands. This can cause the ball to go in different directions or act like a knuckleball. Tons of beginners don’t even realize that their shot consists of using only one arm and believe it’s pushed with both hands. This bad habit needs to be put to an end as soon as possible and new players must be shown the proper motion as soon as they’re strong enough.
Step 5: Follow Through
One of the most overlooked steps of the shooting process is the follow through. This step simply requires the shooter to follow completely through with his shot and get complete extension. The shooter should finish the shot while pointing towards the basket, holding the pose whether or not the shot goes in. This part of the shooting process is so crucial because it allows the player to dissect his shot and figure out why the shot didn’t go in. For example, did the ball go off to the right? If so, it means the player is shooting away from his body. Did the ball go to the left? If so, the shooter’s arm probably came across his body. Was the shot flat? If so, the player did not get full extension on his shooting arm. Was it short? If so, the shooter did not create explosiveness from his legs to propel the ball forward.
(Related: Read about the secrets of Stephen Curry here.)
Huddle Up
Don’t forget that creating a simple, fluid shot form requires a very close attention to detail. Additionally, far more goes into a shot than the release and any tiny misstep in any of these spots could be the reason why you’re missing. At first, these motions are meant to be a robotic movement with the player focusing on checking off things step-by-step. In fact, we’d even go so far as to say that the player should not focus on making the basket. Rather, the player must focus on the form and perfecting each element of the five-step process. If he or she can follow these steps and eventually make them instinctually and second-nature, they’ll certainly develop a smooth and accurate basketball shot over time.
But if you’re still having trouble with your shot, consider booking one of CoachUp’s private trainers and they’ll set you straight in no time. Our experienced team will use their fundamental wisdom to help change your shot and refocus on the things that need fixing. For players that need help moving from two hands to one or must remove their guide-hand on a more consistent basis, any member of the CoachUp family will help you grow as an athlete. What are you waiting for?